Ink Stick or Liquid Ink: Two Paths into Brush Writing
Ink stick or liquid ink for brush writing? Compare setup, handling and cleanup to choose a beginner-friendly way to practise with confidence.
The common beginner’s mistake is buying an ink stick because it looks traditional, then discovering that grinding it takes attention away from learning to guide a brush. For brush writing, the choice between an ink stick and prepared liquid ink is less about authenticity than about what you want to practise: making ink, or putting it on paper.
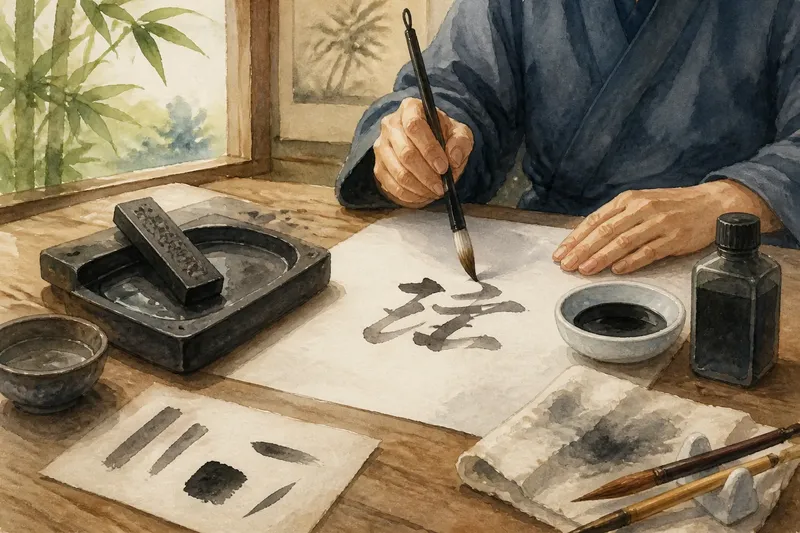
Both can serve a beginner well. An ink stick asks you to prepare the ink on an inkstone; bottled or otherwise prepared liquid ink is ready to use. Each changes the pace, feel and tidying-up of a session. A good first choice is the one that lets you return to the brush without making setup feel like a separate chore.
Choose what you want your first session to teach
If your main aim is to practise strokes, characters or brush control, prepared liquid ink makes the starting point straightforward. Pour a small amount into an ink dish, wet the brush and begin. It removes the grinding stage, so your attention can stay on the brush’s contact with paper and the movement of your hand.
An ink stick suits someone who is curious about the full preparation of writing materials, or who enjoys a measured, quieter beginning. Grinding is not merely a delay before writing: it gives you a chance to notice the inkstone, water and stick as part of the work. But it also asks for time and a little coordination before the first stroke.
Think of the choice like using ground coffee or whole beans. One gets you to the cup sooner; the other makes preparation part of the pleasure. Neither is the correct choice for every morning, and neither tells you how much you will enjoy the writing itself.
Gather a modest set of materials
For prepared ink, begin with a suitable brush, ink dish, absorbent practice paper and a cloth or paper towel for spills. Keep a water container nearby for rinsing, but separate it from the ink dish so you do not accidentally dilute the ink. A shallow ceramic dish or palette gives the brush room to load without dipping deeply.
For an ink stick, add an inkstone and clean water. The stone has a surface for grinding and a well that can hold the ink as it gathers. Choose a stable stone that will not wobble on the table. A small amount of water is enough to begin; a generous puddle can make it harder to judge the ink as you grind.
Use paper intended for brush writing if you have it. Different papers absorb ink at different rates, so a brush that feels manageable on one sheet may spread more on another. For early practice, make a few marks on a spare corner before committing to a full sheet. Follow the care instructions for your ink, brush and stone, since formulations and materials vary.
Prepare liquid ink without overloading the brush
Shake or mix prepared ink only if its container instructions call for it. Pour a little into the dish rather than filling it. You can add more as needed, while a large pool is easy to catch with a sleeve or brush handle.
Wet the brush with clean water, then remove excess moisture by touching the bristles lightly to a cloth or the inside edge of the water container. Dip the brush into the ink far enough to coat the working bristles, not so deeply that ink climbs towards the handle. Turn the brush gently in the dish if the ink needs to spread through the hairs.
Make a few practice marks on scrap paper. Notice whether the brush releases ink in a smooth line or leaves a heavy pool at the start. If it looks overloaded, touch the brush to the dish’s edge or a scrap sheet before trying again. If the line feels dry or broken, reload the brush rather than pressing harder; added pressure changes the stroke as well as the amount of ink.
Grind an ink stick at an unhurried pace
Place a small amount of clean water on the grinding surface of the inkstone. Hold the ink stick comfortably and move it over the wet surface with light, even strokes. Keep the motion controlled rather than bearing down. The aim is to let water and stick gradually form liquid ink, not to scrape aggressively at the stone.
As the liquid darkens, guide it towards the stone’s well. Add water in small amounts if the surface begins to drag, then continue until you have enough ink for a short practice session. Grinding takes longer than opening a bottle, and the amount of time depends on the stone, stick, water and desired consistency. There is no need to prepare a large quantity for a first try.
Load the brush from the collected ink, using the same light touch as with prepared ink. Test a stroke on scrap paper. If the line is too pale or watery for your purpose, keep grinding or allow a little water to settle away from the ink; if it is thick and catches on the brush, add a little water and mix gently. Pay attention to the brush rather than chasing a perfect shade before you begin.
Compare how the two inks behave on paper
Prepared ink offers a quick, repeatable starting point, though its consistency depends on the product and how it is stored. Ink made from a stick gives you more involvement in preparing the liquid, and you can adjust the balance of water and ground ink as you work. Neither option automatically produces better writing: brush condition, paper, loading and hand movement all shape the mark.
Say you have a short evening practice and want to write a few lines before putting the materials away. With prepared ink, you can pour a little, practise and clean up with relatively little preparation. If you instead want to spend that evening noticing how water changes the ink on a stone, grinding can be the main pleasure, with writing following at its own pace. In either case, the observable result is a session suited to the time and attention you chose to give it.
Try not to compare the two by making one rushed stroke with each. Use the same brush and paper, and make a few simple marks with each ink. Look at how readily the brush releases ink, how the line begins and ends, and whether the paper absorbs it in a way you can manage. This is a practical comparison, not a verdict on which material is superior.
Which ink should a beginner choose?
Is liquid ink easier for a first brush-writing session?
It is usually simpler to start with because the preparation stage is shorter. You can focus on loading the brush and making marks, though you still need to manage how much ink the bristles carry.
Does an ink stick make better writing?
An ink stick does not by itself make a line more skilful. It offers a hands-on way to prepare ink, while the resulting mark still depends on the brush, paper, ink consistency and your movement.
Can I use the same brush with both kinds of ink?
Often, yes, if the brush is intended for the ink and is cleaned and dried according to its care instructions. Rinse it thoroughly after writing and avoid leaving ink to dry in the bristles.
How much ink should I prepare?
Prepare only enough for the practice you have in mind. A small amount in a dish is easier to control and leaves less ink to manage when you finish.
Finish the session with the right cleanup
With prepared ink, return unused ink to its container only if the maker’s instructions say that is appropriate; otherwise, keep it separate and dispose of it as directed. Rinse the brush until the water runs clear, reshape the bristles gently and leave the brush to dry in a way that does not trap moisture in its handle. Wipe the dish and work surface before ink dries.
After using an ink stick, rinse the brush and clean loose ink from the stone. Let the stone and stick dry before storing them, and keep the stick somewhere dry so it does not soften or become damaged. Avoid leaving standing water in the inkstone. A clean, dry set is easier to return to next time.
For a beginner choosing ink stick or liquid ink, the useful question is not which method looks more serious, but which one makes you willing to sit down and practise again. Start with prepared ink if you want a direct route to brush handling; choose a stick if preparing the ink is part of what draws you in. Once the brush feels familiar, you can try the other path and decide from experience which rhythm suits your writing.